|
|
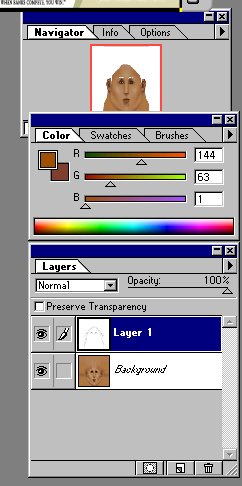
Step 3 (Photoshop)
With the white areas still selected, choose a light and dark shade of a color that you like from the palette (I've used R107 G46 B32 for the background and R144 G63 B1 for the foreground.). Now select the Gradient tool in the tool bar.
|
|
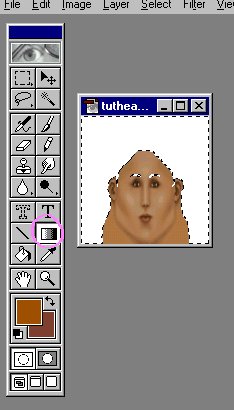
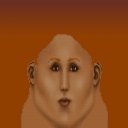
Set your cursor at about the middle of the forehead in the white and pull upwards, and maybe a little sideways (while holding the right mouse button down) until you have a straight line.
|
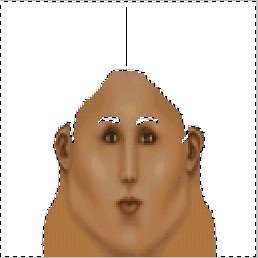
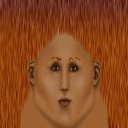
When you release the mouse, you should get something like this:
Looks odd, eh? Well, we're not done yet. Its time to add noise. Don't worry, it will make sense in a bit. First off, deselect everything and create a new layer. Now go back to the hair layer and select only the eyebrows. Cut and Paste them onto the newly created layer. Now go Filter/Noise/Add Noise. Mess with the amount until you've found something that you like. Here I've used 31, Guassian, with Monochromatic selected.
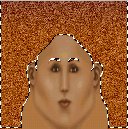
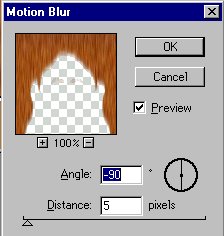
Now for the final step: Motion Blur! Filter/Blur/Motion Blur. Fiddle around with the controls until you find something you like. In general, though, for long hair its best to keep the angle at -90º.
|
|
Looks more like hair now, huh? If you want, you can edit the eyebrows until you get them the way you like. Now its time to do the eyes!
Page 4 --->